VegetarianGluten Free

French Silk Pie

Impossibly smooth, mousse-like chocolate filling in a crunchy Oreo cookie crust, topped with clouds of fresh whipped cream. No raw eggs — the custard base is cooked to 160°F for safety.

Prep

30 min

Cook

20 min

Total

50 min

Rest

6 hr

Servings

8

Difficulty

medium

NK

Nibbleboard Kitchen

April 14, 2026

Be the first to rate
french silk pie recipe recipe

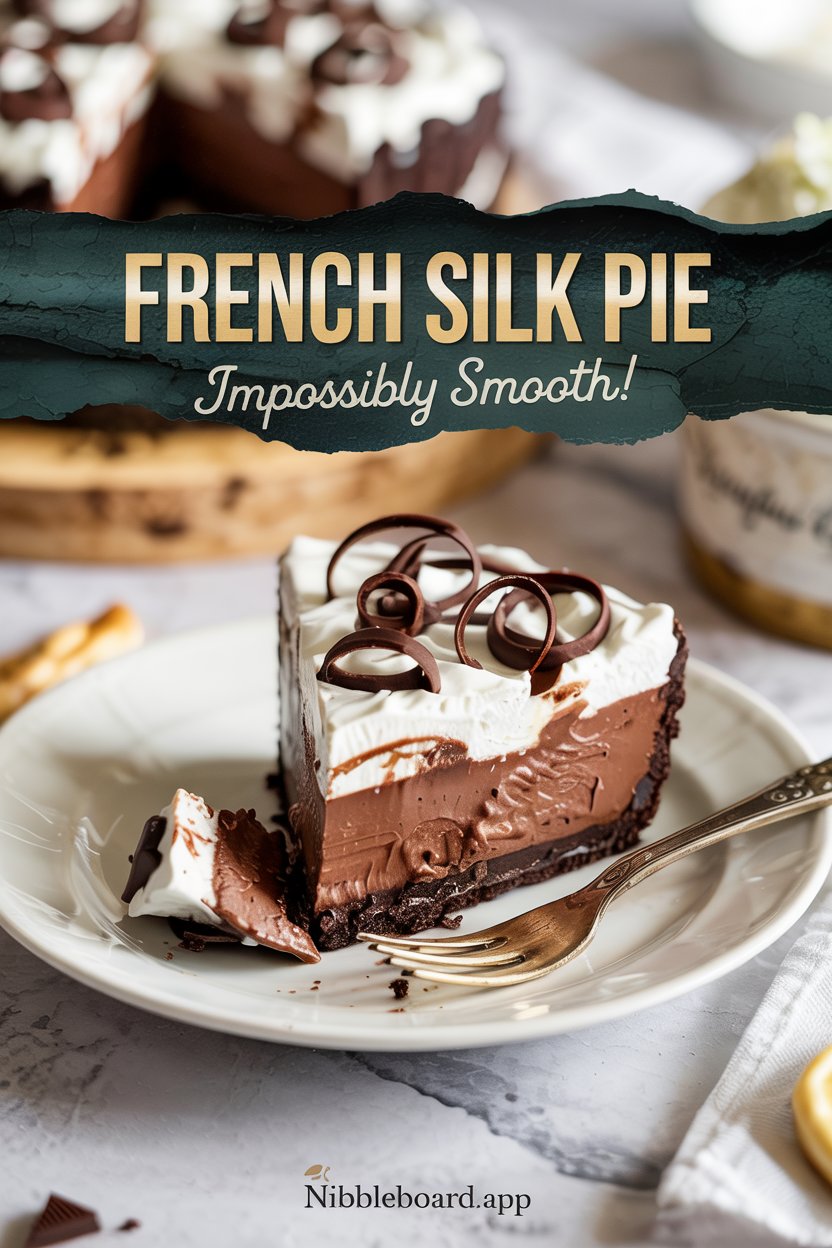
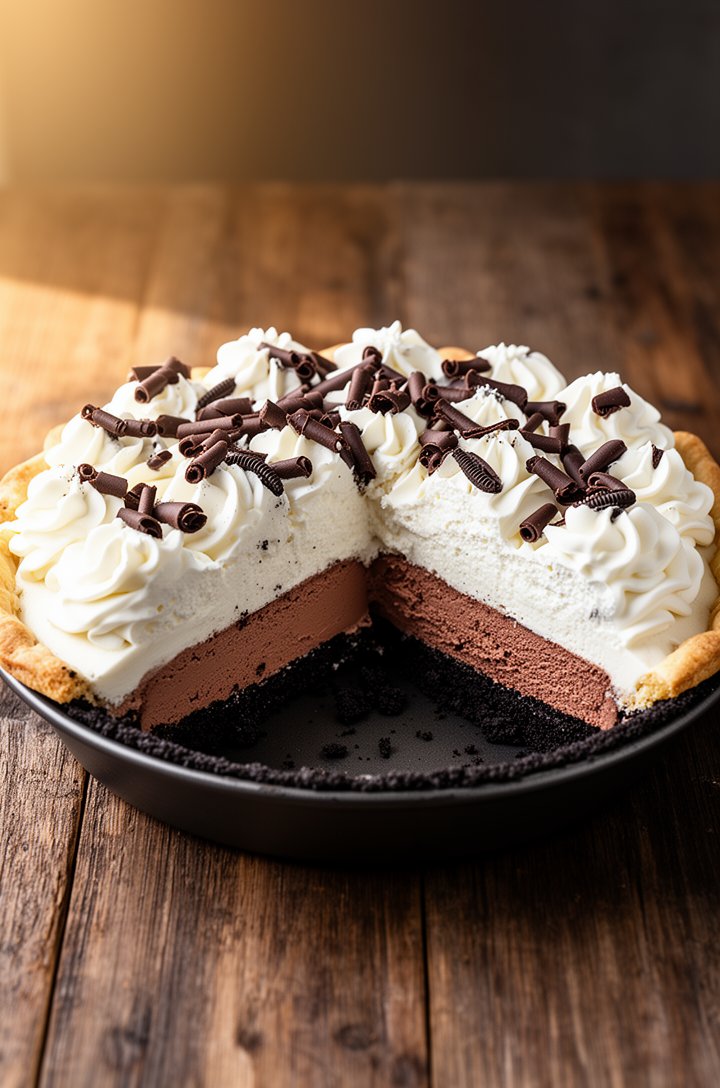
This French silk pie recipe uses a cooked egg method so the filling is completely safe while staying impossibly silky. The Oreo crust adds a deep chocolate crunch that pairs perfectly with the airy mousse filling.

Why This Recipe Works

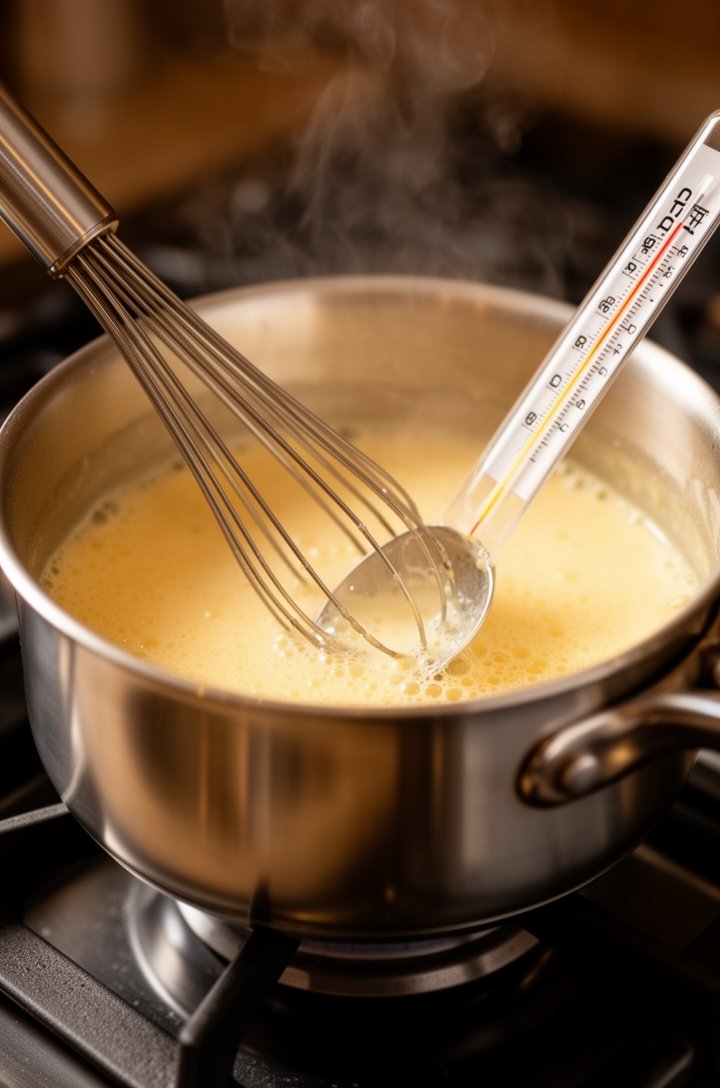
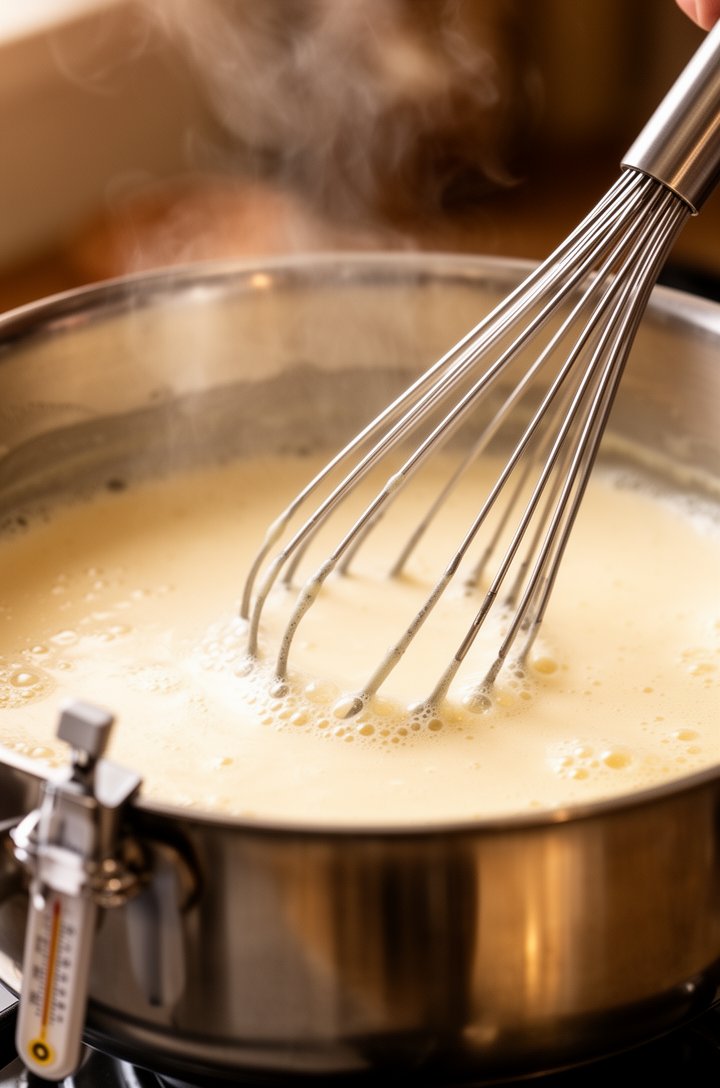
  • Cooking the eggs with sugar to 160°F pasteurizes them for safety while creating a smooth custard base — no raw egg worry
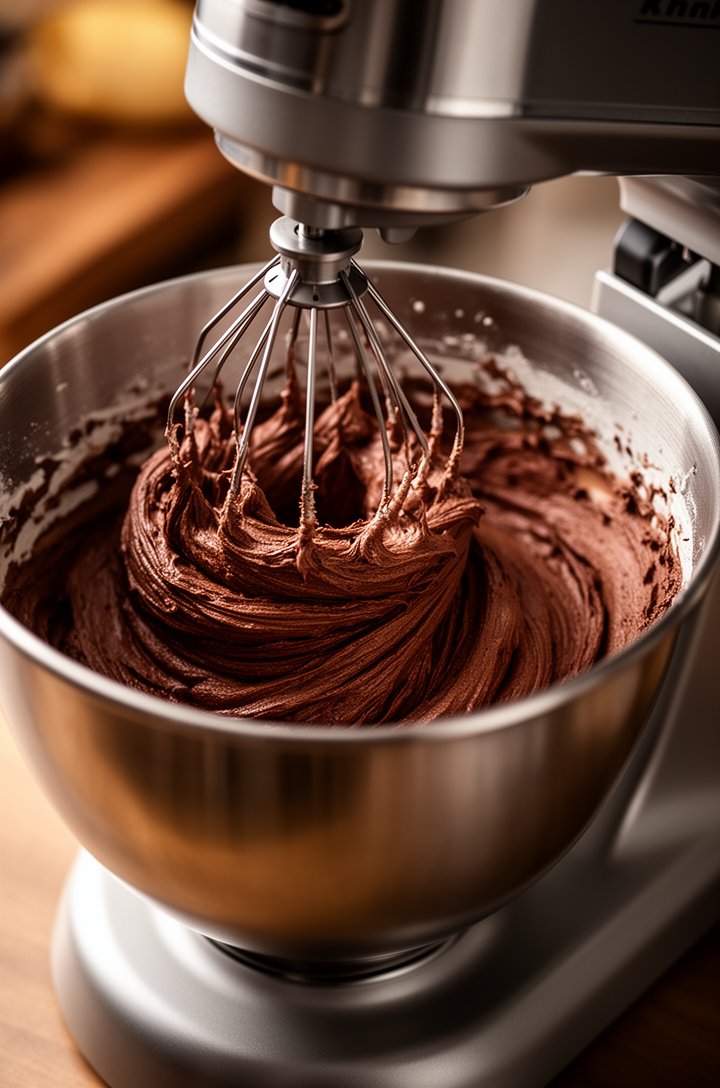
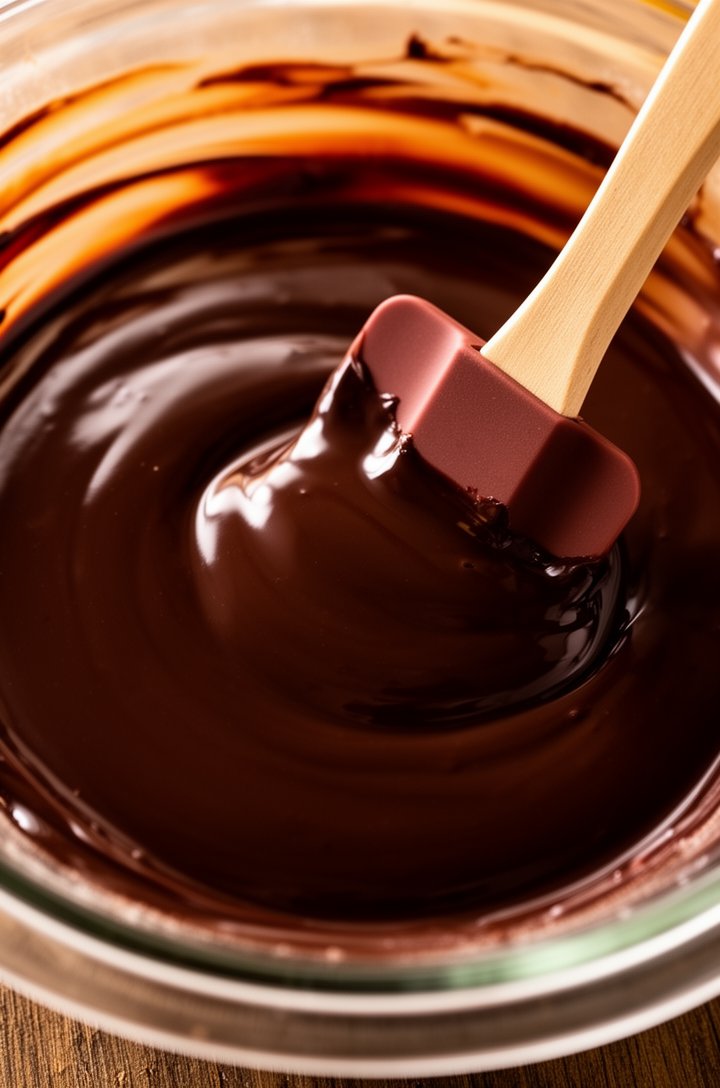
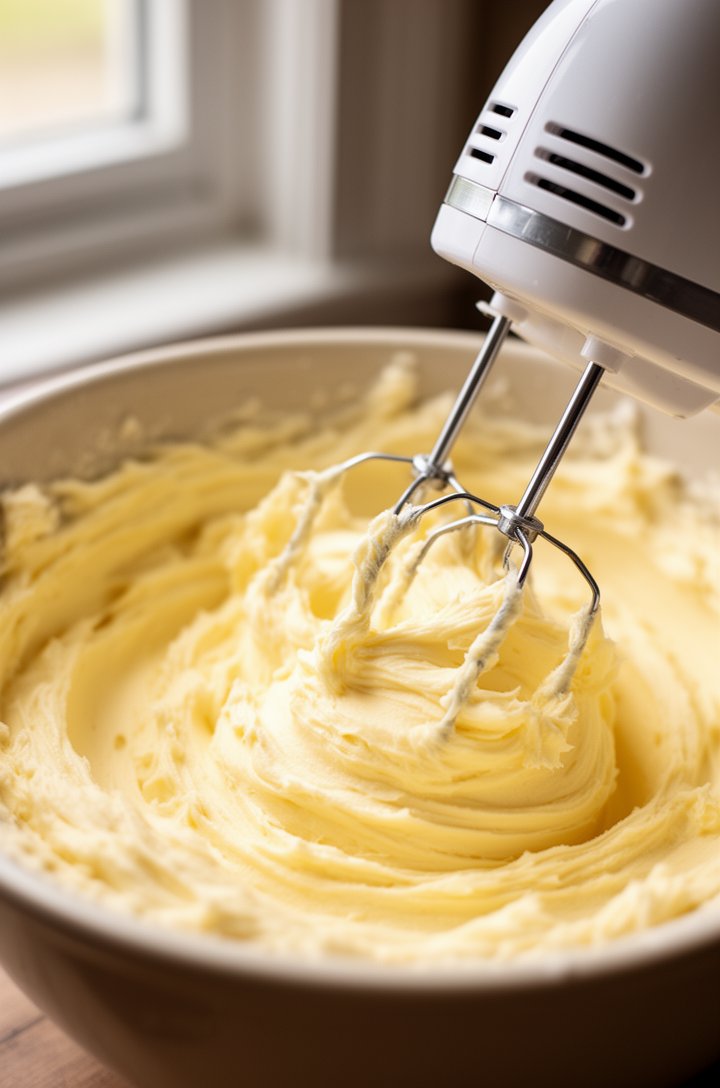
  • Beating the butter into the cooled chocolate for a full 5 minutes incorporates air, giving the filling its signature mousse-like silk texture
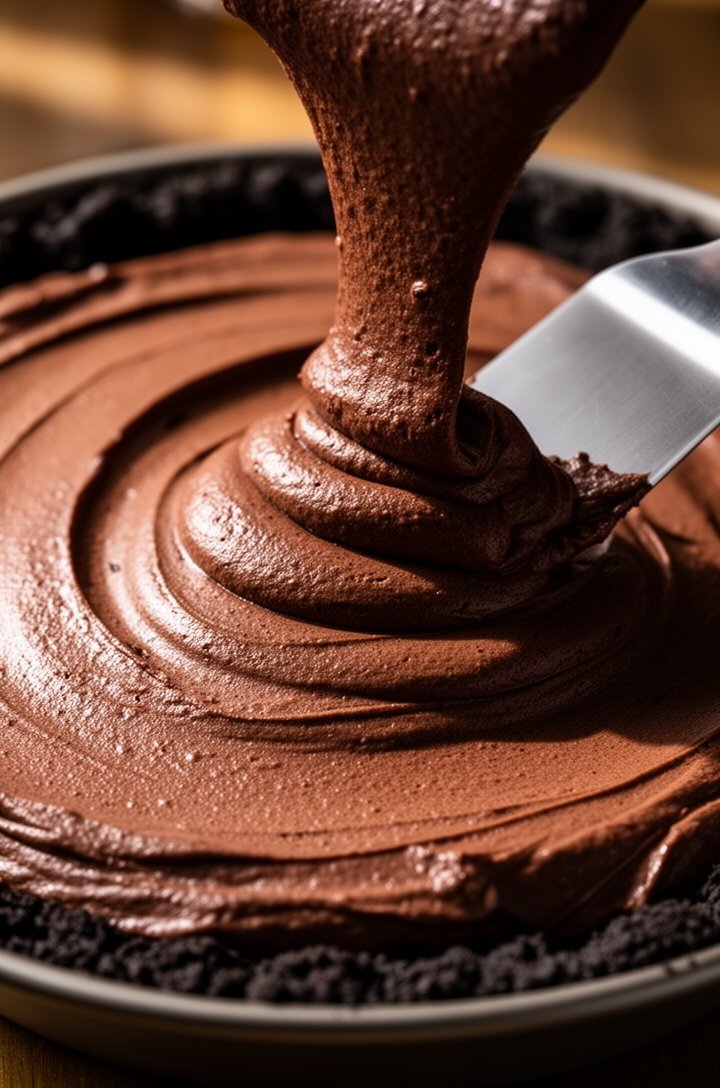
  • Folding whipped cream into the chocolate base adds lightness without deflating — the result is impossibly airy
  • The Oreo crust provides a crunchy, deeply chocolate contrast to the soft filling without the fuss of blind-baking a traditional crust

Oh my god, this French silk pie. I made it for Matt's birthday last year because he kept talking about the one his mom used to buy from Baker's Square, and honestly? I think this one's better. (Don't tell her I said that.) It's this impossibly smooth, mousse-like chocolate filling that just melts the second it hits your tongue, sitting on top of a crunchy Oreo crust that takes about three minutes to throw together.

Overhead flat-lay of French silk pie ingredients arranged on a white marble surface — a bowl of whole Oreo cookies, a block of dark bittersweet chocolate partially chopped on a wooden cutting board, f

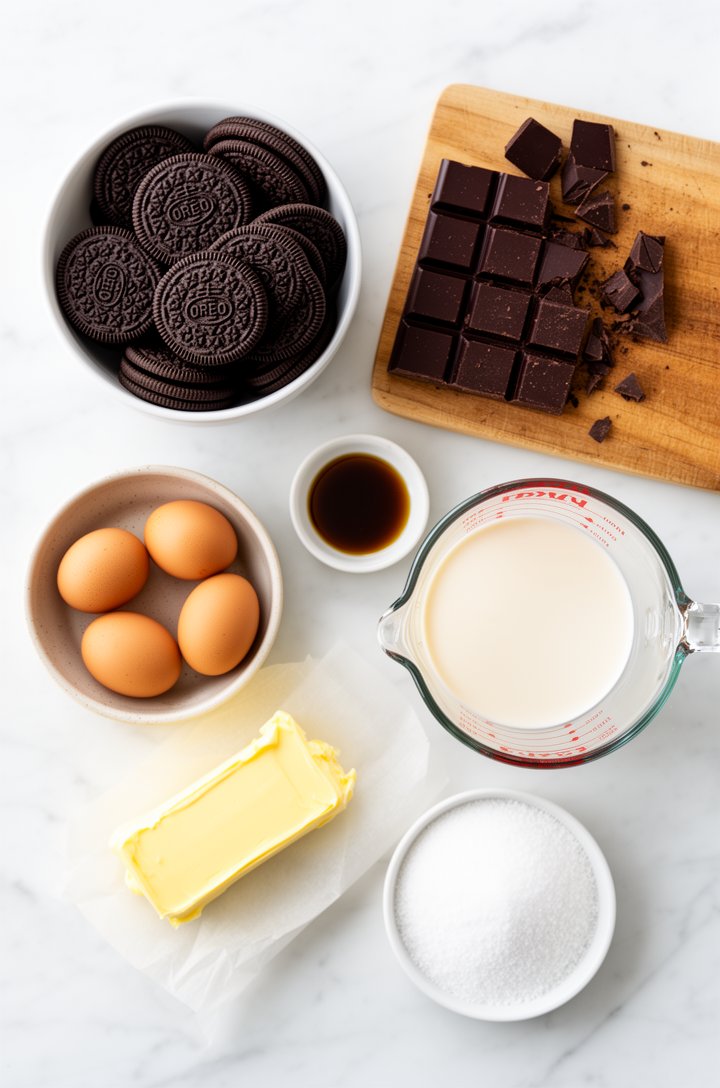
The thing that makes this recipe special is the no-raw-egg method. Traditional French silk pie recipes just beat raw eggs into the chocolate, which always made me nervous — especially with the kids around. This version cooks the eggs with sugar on the stovetop until they hit 160°F, which pasteurizes them completely. You still get that dreamy, silky filling. Zero compromise on texture, total peace of mind.

Close-up side angle of a small stainless steel saucepan on a gas burner, with a whisk stirring a pale golden egg-sugar mixture that coats the back of a metal spoon. An instant-read thermometer inserte

I've made this at least a dozen times now, and it's become my go-to for every holiday, every birthday, every "I need to bring something impressive but I don't want to stress" situation. Lily helped me crush the Oreos last time — she took that rolling pin to the zip-lock bag like it owed her money. The whole thing comes together in about 30 minutes of actual work, then the fridge does the rest overnight.

45-degree angle shot of an electric stand mixer with whisk attachment beating chocolate filling to a fluffy mousse-like consistency, the mixture light and airy with visible volume increase, dark rich

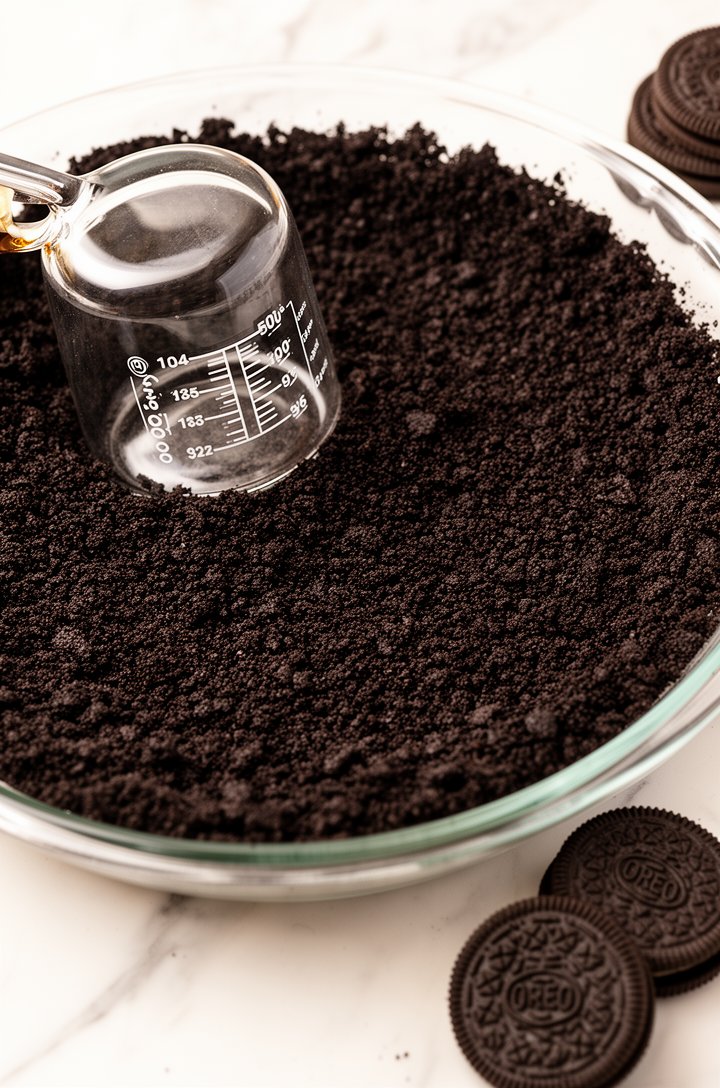
The Oreo crust is a game-changer if you've never tried it — it's basically just crushed cookies and butter pressed into the pan. No rolling out dough, no blind-baking anxiety, no shrinking. And that deep chocolate crunch against the airy filling? Unreal. If you're a pie-crust purist, you can absolutely use a traditional flaky crust instead — I've included that as a variation below.

Extreme close-up macro shot of the chocolate silk filling being folded together with freshly whipped cream using a red rubber spatula in a large glass mixing bowl, showing the marbled swirl where dark

Trust me on this one — once you make this French silk pie, it'll be the only chocolate pie recipe you ever need. Grab your food processor.

Straight-on front angle of a complete French silk pie in a dark pie dish on a rustic wooden table, topped with generous swirls of fresh whipped cream and scattered dark chocolate curls. One slice has

How It Comes Together

Overhead shot of finely crushed Oreo cookie crumbs being pressed into a 9-inch glass pie dish with the bottom of a measuring cup, the dark black crumb mixture forming an even layer up the sides, a few whole Oreos scattered nearby on the white marble counter, bright natural overhead lighting, clean composition
Close-up of melted bittersweet chocolate in a glass bowl, deep glossy dark brown with a smooth liquid surface reflecting warm light, a rubber spatula resting across the edge of the bowl, shot from directly above, shallow depth of field
Side-angle shot of the egg and sugar mixture being whisked in a stainless steel saucepan over medium-low heat, the mixture turning pale and slightly thickened, small wisps of steam visible, instant-read thermometer clipped to the side of the pan, warm kitchen lighting
Close-up of an electric hand mixer beating softened butter in a large mixing bowl, the butter light and fluffy with a pale yellow color, whipped texture visible, shot from a 45-degree angle with soft natural lighting from a nearby window
Overhead shot of the finished chocolate silk filling being poured and spread into the cooled Oreo crust in the pie dish, the filling dark and glossy with a mousse-like texture, an offset spatula smoothing the top, the filling mounded high in the center, warm side lighting creating shadows on the textured surface
Close-up of a single perfect slice of French silk pie on a white dessert plate, showing the distinct three layers — dark crumbly Oreo crust, thick velvety chocolate mousse filling, and pillowy whipped cream crown topped with delicate chocolate curls. A vintage dessert fork rests beside the slice, soft natural lighting from the left, shallow depth of field with creamy background bokeh, professional food photography

Chef Tips

  • I've found that using an instant-read thermometer is non-negotiable for the egg mixture — 160°F kills any bacteria while keeping the texture silky. Don't eyeball it.
  • Let the chocolate-egg mixture cool completely before adding it to the butter. If it's even slightly warm, the butter melts and you lose that fluffy mousse texture.
  • After trying both, I always go with bittersweet chocolate over semi-sweet — it balances the sugar and gives the pie a more sophisticated, grown-up flavor.
  • Make this up to 2 days ahead — it actually sets better overnight. Just add the whipped cream topping the day you serve it.
  • No food processor? Put the Oreos in a zip-lock bag and crush them with a rolling pin. Works just as well, just takes a little more elbow grease.

Variations

Classic Flaky Pie Crust

Swap the Oreo crust for a traditional butter pie crust. Blind-bake at 375°F with pie weights, then cool completely before filling. Gives a more elegant, bakery-style presentation.

Graham Cracker Crust

Use 1½ cups graham cracker crumbs with 6 tablespoons melted butter and 2 tablespoons sugar. Press and bake at 350°F for 8 minutes. A lighter, honey-sweet alternative.

Mocha French Silk Pie

Dissolve 2 teaspoons instant espresso powder into the melted chocolate. The coffee deepens the chocolate flavor without making it taste like coffee.

Peppermint French Silk Pie

Replace vanilla extract with ½ teaspoon peppermint extract in the filling. Top with crushed candy canes for a holiday showstopper.

Serving Suggestions

Serve chilled straight from the fridge with a dollop of extra whipped cream and chocolate shavings. Pairs beautifully with a cup of strong coffee or a glass of port wine.

Make It Ahead

Make the filled pie (without whipped cream topping) up to 2 days ahead and keep covered in the fridge. Add whipped cream topping 2-4 hours before serving.

French Silk Pie

Impossibly smooth, mousse-like chocolate filling in a crunchy Oreo cookie crust, topped with clouds of fresh whipped cream. No raw eggs — the custard base is cooked to 160°F for safety.

Prep

30 min

Cook

20 min

Total

50 min

Rest

6 hr

Servings

8

Difficulty

medium

Calories

780

Print
Share:

Ingredients

servings

Oreo Crust

Chocolate Silk Filling

Whipped Cream Topping

Garnish

Instructions

  1. 1

    Preheat the oven to 350°F. Spray a 9-inch deep pie dish with cooking spray.

  2. 2

    Pulse Oreo cookies in a food processor until finely ground. Add melted butter and pulse until evenly moistened. Press firmly into the bottom and up the sides of the pie dish.

  3. 3

    Bake the crust until set and fragrant, about 10 minutes. Set aside to cool completely.

    10 min

  4. 4

    Whisk granulated sugar and eggs together in a small saucepan. Set over medium-low heat and cook, whisking constantly, until the mixture reaches 160°F on an instant-read thermometer and coats the back of a metal spoon. Remove from heat.

    8 min

  5. 5

    Stir the melted chocolate and vanilla into the hot egg mixture until smooth. Let cool to room temperature, about 20 minutes.

    20 min

  6. 6

    Beat the softened butter with an electric mixer until light and fluffy, about 2-3 minutes. Gradually add the cooled chocolate mixture, then beat on high speed for 5 minutes until airy and mousse-like.

    5 min

  7. 7

    In a separate clean bowl, whip 1⅓ cups cold heavy cream until it begins to thicken. Add 4 teaspoons powdered sugar and beat until stiff peaks form. Fold into the chocolate mixture with a rubber spatula until no streaks remain.

  8. 8

    Pour the filling into the cooled crust, smoothing the top with an offset spatula. The pie will be tall. Refrigerate for at least 6 hours or overnight until set.

    360 min

  9. 9

    Whip 1 cup cold heavy cream with 2 tablespoons powdered sugar and 1 teaspoon vanilla on high speed until stiff peaks form. Spread or pipe over the chilled pie.

  10. 10

    Garnish with chocolate shavings or a dusting of cocoa powder. Slice with a sharp knife dipped in hot water for clean cuts.

Equipment

food processor9-inch deep pie dishsmall saucepanelectric mixerinstant-read thermometerrubber spatula

Nutrition per Serving

780

Calories

7g

Protein

59g

Carbs

60g

Fat

2g

Fiber

55g

Sugar

63mg

Sodium

Estimated Cost

$24.10total
$3.01per serving

*Based on average US grocery prices

Storage & Leftovers

Storage: Cover tightly with plastic wrap and store in the refrigerator for up to 5 days. The crust softens slightly after day 3 but the filling stays perfect.

Reheating: This pie is served cold — no reheating needed. Remove from fridge 5 minutes before slicing for the cleanest cuts.

Freezing: Freeze the filled pie (without whipped cream) wrapped tightly in plastic wrap and foil for up to 2 months. Thaw overnight in the refrigerator, then add fresh whipped cream before serving.

AmericanHolidayDate NightMeal PrepVegetarian

Frequently Asked Questions

Nutrition Facts

8 servings | 1 slice

Calories780

% Daily Value*

Total Fat 59.6g76%
Total Carbohydrate 59g21%
Dietary Fiber 2.2g8%
Total Sugars 55g
Protein 7.2g14%
Sodium 63mg3%

*Percent Daily Values based on a 2,000 calorie diet.

Reviews & Comments

No reviews yet. Be the first to leave a review!

You Might Also Like